

How to Set Up Burp Suite | Setting Up Burp Suite for Web Application Testing
Burp Suite is a software tool that is used for Web Application Security Testing. Developed by PortSwigger, it provides a broad set of tools for identifying and exploiting vulnerabilities in web applications. It’s widely used by security professionals, penetration testers, and developers to ensure the security of their applications. In this article, we will learn how to set up Burp Suite.
Burp Suite comes in different editions:
- Community Edition: A free version with essential manual tools for learning and basic testing.
- Professional Edition: A paid version with advanced features like automated scanning, project files, and custom extensions.
- Enterprise Edition: Designed for organizations, offering scalable automated scanning and integration with CI/CD pipelines.
It is a type of proxy server, which means it sits between the user’s web browser and the web server. It’s a versatile tool that includes features like a proxy server for intercepting HTTP/S traffic, Repeater, intruder, scanner, decoder, and more.
1. Proxy: Acts as an intermediary between your browser and the target web application, allowing you to intercept, inspect, and modify HTTP/S traffic. This is essential for understanding how the application communicates and identifying vulnerabilities.
2. Scanner: An automated tool that scans web applications for common security issues like SQL injection, cross-site scripting (XSS), and more. It helps save time by identifying vulnerabilities efficiently.
3. Intruder: A powerful tool for automating customized attacks. It can be used for tasks like brute-forcing login credentials or testing for parameter-based vulnerabilities.
4. Repeater: Allows you to manually modify and resend individual HTTP requests. This is useful for testing specific inputs and observing how the application responds.
5. Sequencer: Analyzes the randomness of tokens, such as session IDs, to determine their predictability. This helps in assessing the security of authentication mechanisms.
6. Decoder: A utility for encoding and decoding data in various formats (e.g., Base64, URL encoding). It’s handy for understanding and manipulating encoded data.
7. Comparer: Compares two pieces of data to highlight differences. This is useful for analyzing changes in responses or identifying subtle variations in application behavior.
8. Reporting: Generates detailed reports that summarize findings and provide actionable insights. This is particularly useful for communicating results to stakeholders.
Downloading and Setting up Burp Suite.
1. Go to Burp Suite official website and download the installer Link.
2. Select Burp Suite Community Edition and also select your device version.
3. After installing that give the full execution permission using “chmod +x and filename”.
4. And then run the Burp file “./filename.sh”.
5. Complete the setup Wizard , choose the path and complete the setup and click finish.
6. Now go to the path where the Burp Suite is located, and run the BurpSuiteCommunity.
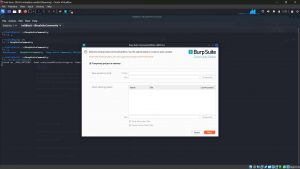
7. Click “Next” and then click “Start Burp”

This is how the Burp Suite is Installed , and the next step is to configure the proxy settings.
Configuring the proxy
1. For intercepting the traffic in Burp , you need to configure the proxy settings.
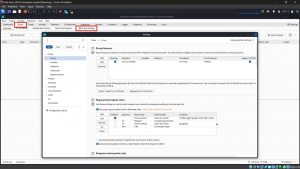
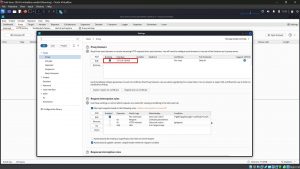
2. You should see an entry in the table with a ticked Checkbox in the Running column, and “127.0.0.1:8080” showing in the Interface column.
3. Go to the proxy section and Turn on Intercept if it is off .
Configuring Browser
1. Install Foxy Proxy extension in Firefox and set up Proxy settings
2. And configure the Burp Proxy into the foxy proxy
3. In Foxy Proxy , go to the proxy section and , click on add and add a new proxy settings
4. Add a name , Hostname (127.0.0.1) , and port (8080)
5. Go to burp/ or 127.0.0.1:8080 in Firefox.
6. The CA cert must be installed in your browser as a trusted root so that the browser will trust the SSL connections made to Burp Suite.

7. Download the CA Certificate and save it.
8. Go to the settings of Firefox and search for “certificates”

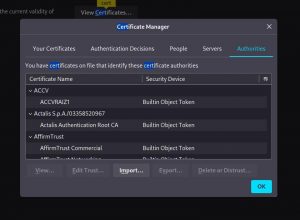
9. Click “Import” and then add the Certificate file that downloaded earlier. Once the Burp’s CA cert is installed you should have no problem using Burp Suite as an interceptor. At Firefox, try to browse anything and you will not see any security warning. At Burp Suite, when the interceptor is turned on, you will see all the requests made by the browser. You can analyze the requests and make any modifications. When you’re satisfied, click on the Forward button to send the message.
Conclusion
In this blog, you learned how to Set Up Burp Suite in Kali Linux.
Written by Prithul Raj M R
Prithul Raj, a cybersecurity practitioner diving deep into the world of ethical hacking, forensics, and Linux-based security.